


How to 3D Print Aligners
Clear aligners have revolutionized orthodontic care by offering an aesthetic, comfortable alternative to traditional braces. The digital workflow—from patient scanning through final aligner delivery—minimizes manual steps, reduces turnaround times, and empowers clinics to maintain full control over treatment. This article details how to 3D print aligners using LuxCreo’s complete line of dental materials and printing solutions, ensuring regulatory compliance, exceptional accuracy, and optimal patient outcomes.
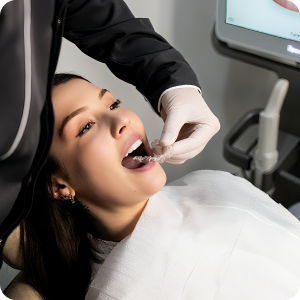
I. Patient Data Acquisition
Accurate patient models are the foundation of effective 3D-printed aligners.
- Intraoral Scanning: Employ a high-resolution intraoral scanner to capture full-arch anatomy.a minimum resolution of 50 µm is recommended to ensure clear delineation of tooth margins.
- Cone-Beam CT (Optional): For cases requiring skeletal assessment or impacted teeth planning, integrate CBCT data. Ensure radiation doses adhere to ALARA principles.
II. Treatment Design (Clinician)
- Review intraoral scan in treatment-planning software (e.g., 3Shape, Titan) to define the clinical objectives:– Sequential tooth movements and staging parameters (number of stages, overbite/overjet corrections)– Attachment locations and optimal trim-line positions
- Finalize and approve the AI-driven treatment plan to achieve the desired tooth positions.
III. Model Preparation & STL Verification with LuxFlow 3D printing preparation software
Upload the clinician’s approved treatment plan STL sequence directly into LuxDesign.
Before printing, verify model integrity and prepare for supports.
- Mesh Repair: Utilize LuxCreo’s built-in mesh analysis to identify non-manifold edges or inverted normals. Use LuxDesign to create the aligner shell. Auto-repair functions maintain watertight geometry.
- Orientation & Nesting: Using LuxFlow, position models at a 10–15° tilt to balance support requirements and surface quality. Nest multiple stages on the build plate—up to 12 per run on LuxCreo’s DLP platform.
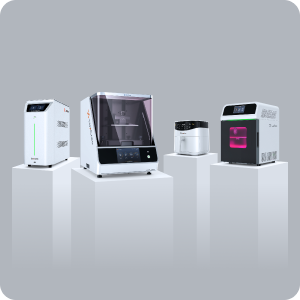
IV. Materials & Printer Setup
LuxCreo’s dental-grade materials and printers are engineered for clear aligner fabrication.
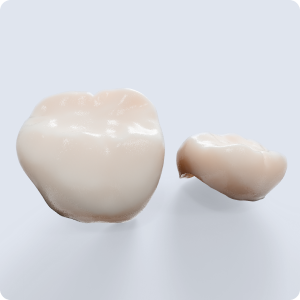
- Resin Selection: Use LuxCreo Dental Clear Resin, it features high translucency (90% light transmission) and biocompatibility certifications (ISO 10993).
- Printer Calibration: Adjust layer thickness to 50 µm and exposure times to 2.5 seconds per layer. Confirm resin tank and build platform are clean, level, and at 25 °C to ensure consistent polymerization.
V. 3D Printing Execution
Streamline the print cycle for reliability and repeatability.
Resin Loading: Ensure the printer is filled with the correct resin, and no debris is sitting in the tank. Then select your file and press “Print.”
VI. Post-Processing & Finishing
Meticulous post-processing delivers clear, smooth models ready for thermoforming.
- Washing: Rinse printed models in LuxCreo’s proprietary isopropyl-alcohol solution using an ultrasonic bath for two, eight minute cycles
- Heat Cure: A 10-minute heat cure, only necessary for appliances printed with DCA resin
- Light Curing: Post-cure under 405 nm UV light for 10 minutes per side to achieve full mechanical properties and biocompatibility.
- Support Removal: Gently break away supports with flush cutters, then fine-sand contact points.
- Quality Control: Verify dimensional accuracy with digital calipers (tolerance ±0.1 mm) or a secondary scan.
VII. Aligner Fabrication & Delivery
Transform printed models into patient-ready aligners and ensure proper fit.
Patient Fitting: Conduct an initial fit check. Provide wear schedule (22 hours daily) and hygiene instructions—clean aligners with a neutral pH cleaner and soft brush.
VIII. Workflow Maintenance & Compliance
Consistency and traceability underpin a reliable production pipeline.
- Inventory Management: Rotate LuxCreo Dental Clear Resin batches based on expiration dates. Store dark and between 15–25 °C.
- Equipment Servicing: Perform weekly checks on optical sources, resin tank condition, and platform calibration. Log all maintenance for audit trails and regulatory compliance (FDA QSR/ISO 13485).
Conclusion
Mastering how to 3D print aligners in-house with LuxCreo materials empowers dental practices to deliver customized, efficient care. From precise printing digital planning to reliable post-processing, LuxCreo’s ecosystem ensures aligners meet the highest standards of clarity, fit, and safety—paving the way for the future of orthodontic innovation.
Subscribe to Our Newsletter
Be the first to get our latest updates and free trials!
Popular Resources


Follow Us
![]()
![]()
![]()
![]()
Featured Products

4D Aligner™
First Smart ActiveMemory™
Aligner
")
iLux Pro Dental Solution
Ultimate 1-Click Dental
Application Solution
")
LuxCloud Dental
Your One-stop Digital Dentistry
Platform